Animated GIFs are on the rise again, blanketing Tumblr, Twitter, and much of the Switched team chatroom. Some sites offer GIF-making tools, but most, at best, do little more than take multiple screencaps of a video, leaving you with a five-frame result that’s not going to get you any Internet cred. Amazingly, there still isn’t a dedicated app for making amazing works like these, so you’ll have to get your hands a little dirty. We’ve spent far too much time perfecting our process, which involves YouTube downloads, Photoshop and QuickTime — but it works.
1. Download the Video
We’re going to assume you’re starting with a YouTube video as your source, but the essential step here is downloading the video you want to cut up to your desktop. Some YouTube videos offer a download button, but for most, you’ll probably need to grab a file downloading extension for your browser. We recommend Easy YouTube Downloader (Chrome) and Video DownloadHelper (Firefox). Legally, you’re on your own.
2. Convert to. MOV
Photoshop is finicky when it comes to filing formats, so you’re going to have to convert the FLV or m4v file format you downloaded from YouTube into a. MOV file. The cheap and easy way is to open your video in the latest version of QuickTime on OS X, select File > Save As, and export in the ‘Movie’ format.
3. Import to Photoshop

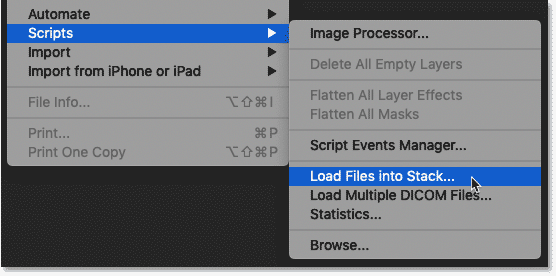
We’ve tested this on multiple computers and versions of Photoshop, and the process works for most versions of CS3 and above. Go to File > Import and select Video Frames to Layers. Select the video you grabbed from YouTube, and Photoshop will prompt you to import your footage. If your movie is very short (i.e., under five seconds), just go ahead and import From Beginning to End, and make sure you’ve got ‘Make Frame Animation‘ selected. For longer videos, use Selected Range Only, and select the duration of the video you want Photoshop to grab by holding down Shift and sliding across the video timeline. Just go for the general length; you can crop tighter in the next step.
4. Tweak the GIF

The video frames to layers tool imports every frame of your video into a different layer in Photoshop, which means a two or three-second video will leave you with hundreds of frames. After importing, the Animation window should appear (Window > Animation will bring it up if it doesn’t), revealing every layer as its own separate frame. Just like editing in iMovie or other video editing apps, just find the beginning and end of the action and delete all the other frames. Depending on what you’re going for, this may be only 10 frames or it may number in the hundreds.
5. Export
Once you’re satisfied with your creation, follow these steps to export:
1. In the animation window, make sure you’ve set the dropdown to ‘Forever’
2. Select File > Save for Web & Devices
3. Under export settings, set the file type to GIF.
4. Save, upload to your favorite image host, and enjoy:

6. Optimizing Your Images
Animated GIF files are known to bring even modern-day browsers to a screeching halt with their large file size. The quickest way to cut things down is to crop and resize; an 800×600 GIF may look great, but will probably result in a giant file unless it contains only a few frames. Cropping or resizing your image to 300 or 400 pixels will help, and you can also trim the fat by dialing back Colors and bumping up Lossiness (in the ‘Save for Web’ dialogue). If you’re having trouble keeping the size down, you can also set Photoshop to only import every other (or every third, fourth, etc…) frame — this speeds up the animation, but that’s not necessarily a bad thing. Unless it’s an absolutely amazing piece of video, try to keep everything under 500K.
Of course, total GIF mastery involves ripping video and adding animated ‘Deal With It’ sunglasses, but that’s another guide entirely.


